Batch Scanning my Slide Collection
With the new Epson V750-Pro scanner in place for the past few weeks and a few hundred slide scans under my belt, here is a progress update:
Everything you may have read about slide and negative scanning being a slow process is true. If time is going to be an important part of the equation it is certainly better to just send your slides and negatives off to a service and pay them to do the scans. In my case I knew that the scanner could poke along on a batch of scans while I did other work. In fact it is working on a set of twelve slides as I write this. This batch of twelve will take about 45 minutes to complete, and that is not at the highest resolution settings.

It took several days of trial and error to make a final decision on which software and which settings to use. With hundreds of scans waiting in the boxes I did not want to move forward without some degree of confidence that I had things set up properly. There are so many possible ways of doing this that I knew I had to pick a workable path and move forward with the project.
In the end I decided that I needed to set some sort of baseline criteria. I decided that I wanted to be able to print a quality 4×6 image from any of the batch scanned photos. With a mix of personal and professional images I had differing end goals for some of the photos but I did not want to take the time to sort everything out before hand. With the personal photos I knew that the majority would not go beyond digital sharing, but I would print some to make traditional family albums. With the professional images I needed enough resolution to examine them carefully. If I decide to do more with any one of those images I can rescan at higher resolutions and with individualized image adjustments, or send it out for even better scans than this scanner can deliver. It is a good scanner but I am not fool enough to think that it can compete with professional industrial level equipment.
While all of that seems simple enough, it took two days of playing around with the bundled software to decide on a workflow and move forward. I scanned the same set of twelve slides about a dozen times before making my decision and actually getting to work on the boxes of slides. The Epson scanner comes with two different sets of software. The EpsonScan and SilverFast 8.
For my batch scanning needs the EpsonScan software won out over the SilverFast 8. The SilverFast 8 is clearly a more powerful bit of software and will likely come in handy for one off high res scans, but it proved to be just about useless for batch scans. The EpsonScan software is not much better in terms of intuitive user friendliness… but with far fewer variables to control I stumbled upon what I considered the right combination of settings to meet my batch scan needs.

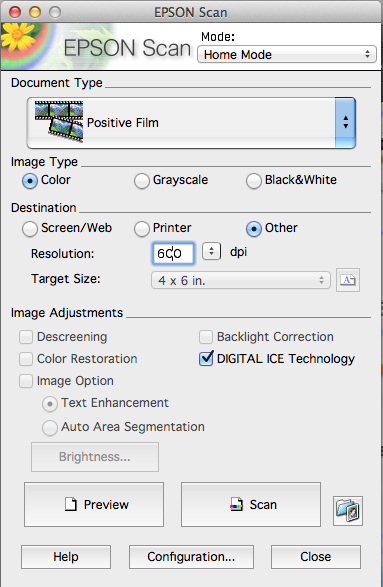
My scanner settings are as follows:
1. Mode = “Home” The options available in each mode vary greatly. I would have thought that I would be better off in “Professional” mode… but that did not end up being the case.
2. Scan res is 600dpi
3. Target size is 4×6 inch
4. Digital ICE = On
Slide Scan Workflow is as follows:
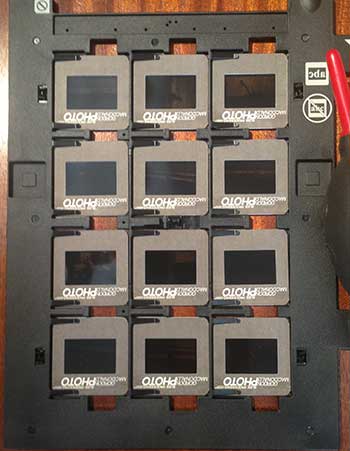
1. Load slides in tray. (I load them all horizontally)
2. Blow off dust with bulb blower.
3. Preview scan. (The Epson software is much better at auto detecting the images than the SilverFast software)
4. Adjust brightness/contrast on a few of the images if needed. (The options for individual image adjustment are very limited in this mode)
5. Click scan (you will have to figure out how you want to name and number your scans)
6. Do other work for about 45 minutes while the scan completes.
7. Load another batch of scans and get it going.
8. Open the batched scans in Photoshop.
9. Rotate as needed.
10. Auto Tone (there isn’t much post production wiggle room with a scan this size. A simple auto tone gives a quick happy average that works most of the time)
11. Save as High Res JPEG.

With this I end up with a 3600×2400 image that is 6 – 8 megs in size. With a touch of sharpening they print as 4×6 just fine and are plenty large enough for a large preview on the computer.
The example photo was picked at random. The top image is as it came from the scanner (resized for web) and the bottom is after a ‘auto tone’ on photoshop. A quick way to get a perfectly acceptable image for my purpose of batch scanning my slide collection. With the collection digitized I will better be able to sort and use the images for a variety of purposes and decide on which few images to rescan for higher resolution.
It would take me several days to run through all of the different settings I tried in the SilverFast 8 software. Out of the box I had assumed that it would be the better slide scanning solution and for some applications I have no doubt that it probably is. For the job of getting my large collection of slides batch scanned the EpsonScan software is the better solution. A more complete review of the Epson V750 Pro Scanner can be found here.
